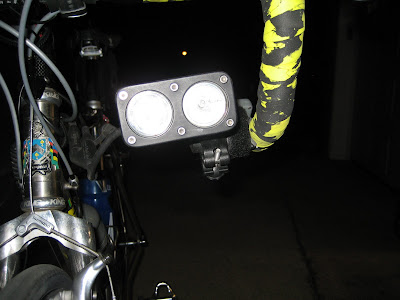
The
Niterider Digital Pro-12 E bicycle light is such a well built system that with regular use the
rechargeable battery will die long before the light has lost it's useful life. Since this light was originally built battery technology has greatly advanced and the new Li-Ion technology has pretty much taken over in this area and many
pre-built battery pack are available from suppliers that work well to rebuild the battery for this light.

The
Niterider Digital Pro-12 E bicycle light battery is pretty simple and no electronics "in" the battery so the light head itself has all the electronics in it. Therefore if you can supply it with an
agreeable current it will work. This is not the case with the next generation lite from
Niterider called the
Niterider Digital Pro-12 LCD which came with a "Smart" battery with electronics and a control board in the battery so you cannot just drop in a battery pack,
soder it up and be in business.

The pack I found is a 14.8 volt 4400
mill amp Li-Ion battery back that is already
pre-assembled with a PCB control board that these new batteries require. These also require a new charger but it a reasonable cost item. The original battery was a 13.2 volt but the light is capable of handling the higher voltage and it makes the light a little brighter. I am in the process of
buying a 13.2 volt regulator and will update when it is installed.
Here is the link for the battery:
http://www.all-battery.com/li-ion18650148v4400mahpcbpreotectedrechargeablebatterywithbareleads.aspxHere is the link for the charger:
http://www.all-battery.com/universalfastsmarttlp3000chargerforli-ionli-polymerbatterypack148v4cells.aspx
Basically all you do is:
1 - break open the battery by jabbing and working around a thin metal piece at the junction of the top cap and battery case bottom to break the glue bond
2 - Twist the top off to expose the old battery.
3 - Cut the two leads close to the old battery connections
4 - Take out the old batteries and the spray foam used to hold them in place.
5 - Slide in the new battery pack - It will ovalize the base a little but will be corrected enough when you screw back on the top cap.
6 - Put some shrink rap on the leads and then soder them black to black and the red to the white.
7 - Slide the Shrink wrap down and heat with a flame.
8 - Twist the cap back on.
9 - Cut the old charger connector off and connect it to a removable lead supplied with the charger. (You will not be using the old charger any more.
10 - Select the 14.4 volt level on the charger and plug it in to charge the battery.
11 - Enjoy.


 Picture of the bottom cap with the pigtail sticking out. The pipe clamp is used to hold the cap on while providing an easy way to remove the internal antenna from the outer casing if needed.
 Close-up of the bottom cap with slot cut for cable exit.
 This is the internal PVC carrier with the antenna wire wrapped around it and the pigtail goes up through the bottom and comes out at the cutout futher up the pipe.
 This is a shot of the cutout and the showing the connection of the pigtail to the antenna wire. The wire goes through the 3/4 pvc pipe via drilled holes. Wire is bare 12g copper wire.
 Close-up of attachment to antenna wire.


 This one was around 2.5 pounds.
 This one weighted 5 pounds 4 ounces!!

 Getting ready to lower the tower onto the ladder to replace the balun.
 The culprit! Quite fried. Yikes!!
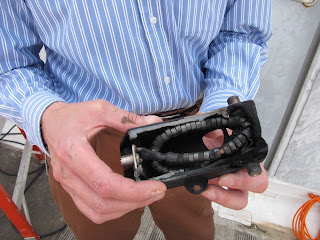 Implementing the lightning arrestor box. Nice work Jack KA4OTB.
 After. Nice.
 Checking out the successful work on the antennas.