Tuesday, March 31, 2009

Niterider Digital Pro-12 E Bicycle Light Battery Rebuild

The Niterider Digital Pro-12 E bicycle light is such a well built system that with regular use the rechargeable battery will die long before the light has lost it's useful life. Since this light was originally built battery technology has greatly advanced and the new Li-Ion technology has pretty much taken over in this area and many pre-built battery pack are available from suppliers that work well to rebuild the battery for this light.


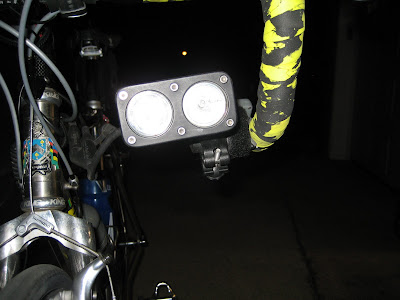
The Niterider Digital Pro-12 E bicycle light battery is pretty simple and no electronics "in" the battery so the light head itself has all the electronics in it. Therefore if you can supply it with an agreeable current it will work. This is not the case with the next generation lite from Niterider called the Niterider Digital Pro-12 LCD which came with a "Smart" battery with electronics and a control board in the battery so you cannot just drop in a battery pack, soder it up and be in business.


The pack I found is a 14.8 volt 4400 mill amp Li-Ion battery back that is already pre-assembled with a PCB control board that these new batteries require. These also require a new charger but it a reasonable cost item. The original battery was a 13.2 volt but the light is capable of handling the higher voltage and it makes the light a little brighter. I am in the process of buying a 13.2 volt regulator and will update when it is installed.

Here is the link for the battery:

http://www.all-battery.com/li-ion18650148v4400mahpcbpreotectedrechargeablebatterywithbareleads.aspx

Here is the link for the charger:

http://www.all-battery.com/universalfastsmarttlp3000chargerforli-ionli-polymerbatterypack148v4cells.aspx

Basically all you do is:

1 - break open the battery by jabbing and working around a thin metal piece at the junction of the top cap and battery case bottom to break the glue bond

2 - Twist the top off to expose the old battery.

3 - Cut the two leads close to the old battery connections

4 - Take out the old batteries and the spray foam used to hold them in place.

5 - Slide in the new battery pack - It will ovalize the base a little but will be corrected enough when you screw back on the top cap.

6 - Put some shrink rap on the leads and then soder them black to black and the red to the white.

7 - Slide the Shrink wrap down and heat with a flame.

8 - Twist the cap back on.

9 - Cut the old charger connector off and connect it to a removable lead supplied with the charger. (You will not be using the old charger any more.

10 - Select the 14.4 volt level on the charger and plug it in to charge the battery.

11 - Enjoy.

Niterider Digital Pro-12 E Bicycle Light

I do a lot of road night riding due to time constraints of two small children and the light system I use is an older version made by Niterider called the Digital Pro-12 E (Extream). This lighting system is about 8 years old but I think it is still one of the best ever built from a capability, reliability and safety standpoint and by rebuilding the battery unit with a new Li-Ion battery it is also longer lasting and lighter than the original configuration.


Let me also say that here in 2009 there are some great bicycle lights being made with the new LED technology with fabulous light output, light weight, reliable and great prices and I have recommended many to people looking to do some night riding but I like the older system I have mainly because of the vastly superior integrated taillight and the ability to easily rebuild the battery.

Tail Light


Many people focus a lot of their attention on the headlight and then slap a little red blinky light on the back. To me the most danger from night riding is the car coming from behind me in my lane as they are the car that will need to take some action not to hit me. So I tend to put a lot of focus on the ability of the tail light. The tail light that works with this Niterider system is pretty much considered the brightest you can get and the mounting bracket hangs the light low below your seat bag for great visibility to drivers. Also since it runs off the battery powering the headlight it does not lack a strong power source and you do not have to manage another set of batteries. This tail light really gets the drivers attention and you can tell a marked difference in the respect you get versus the much less powerful taillights.

Niterider has chosen with their new generation of LED lights not to include a capability to drive their tail light from the light battery so you will have to get an older light to use their great tail light which you can still buy as a part off their web site. It's not cheap but you get what you pay for.

Head Light

The Niterider Digital Pro-12 E is a dual bulb halogen light that has a 20 watt flood and a 12 watt spot bulbs. The digital control allows you many different power and light settings to cover whatever your lighting needs are. You can run it at 32, 20, 12, 9, or 6 watts and it also has walk, flash, sos and beacon modes if you need them. It uses a water bottle battery which can be easily rebuilt and makes for easy and quick mounting.


I have rebuilt two batteries so far with one done with NiMH and another with a new Li-Ion battery pack and the new Li-Ion pack is great and half the weight and 25% longer battery life.

I get these off of ebay for about $50 and then rebuild the battery to create a great light that will integrate with the fabulous Niterider Tail Light for many more years of service.
Summary
If you want a great light with a superior integrated tail light solution then it is worth the extra effort to resurrect one of these system off of ebay with a simple new Li-Ion rebuild of the battery and if you are getting a light for road riding then check out the ability of this tail light in person before making a serious investment as it could very well be the difference between life and death when night riding.
KW

New Bicycle Light Mount Post

I found a new mounting post for my bicycle light that works great and continues to let me use "wing" type handle bars which have less space for mounting stuff.

This is a Minoura "Besso" which is primarily designed for mounting on your fork and has a broad range of size adjustment and works great on this handlebar application. Rock steady and the attachment process is great.

Vendors marketing info:

Minoura Besso LH-50 Fork Mount for Headlights. Minoura's Bésso LH50 fork mount clamps to either side of your front fork, provides a good spot to mount your headlight. Mounting your headlight well below eye level helps you see potholes and other road hazards, because they'll cast visible shadows. It can also be used to attach various accessories to your handlebar, stem or frame tubes. Adjustable clamp band fits around things from 19-35 mm (3/4" to 1 3/8") in diameter.


Tuesday, September 18, 2007


For those going to the Southern Tandem Rally I have acquired the route files for all the standard routes and have provided them in jpeg format. Click on the image for a larger view. If you want more details then e-mail me at kwyer@comcast.net and I can send a route sheet or a more detailed map.
Friday looks great in that we are getting way out in the country on some roads that should have very little traffic.
Saturday looks good also with a lot of time along the river and the climbs look very manageable.
I do not have the files for the KOM options. You are on your own you crazy people.


Tuesday, May 8, 2007

3S3M on a Tandem Baby!!!!!


Hope and I achieved another milestone this last weekend by riding our tandem for the 101.43 miles of the 20th annual "Three State, Three Mountain"(3S3M) challenge in Chattanooga, Tennessee. This year over 2,300 bicyclist took on the challenge of getting up over Signal Mountain in Tennessee, Sand Mountain in Alabama, and Lookout Mountain in Georgia which ammounts to arond 8,600 feet of climbing for the day.

May thanks to the Attril tandem of Ed and Fran for lending us a wheel to ride for most of the day and to Phil Schare for "keeping an eye on our 6" and lending encouragement.

Some Stats from the day:

Keith, Calories Burned : 6,243
Hope, Calories Burned: 4,300+
Total Distance: 101.43 miles
Feet of Climbing: Approx. 8,600
Ride Time: 6:43
Total Time: 8:22
Average Speed: 14.4
Top Speed: 51.9 mph (Yes, Really)
Flats: 1 for our Tandem and 1 for Ed and Fran's, 0 for Phil this year - yea!

Pre-Ride Consumption

Keith - PBJs:1, Milk: 1, Gatoraid: 1
Hope - PBJs:1, Milk: 1, Gatoraid: 1

Ride Consumption

Keith - Oatmeal Cream Pies: 1, PBJs: 3, Fig Newtons: 9, Oranges: 4, Cliff Bars: 2, Bottles of Water: 2, Bottles of Gatoraid: 8.
Hope - Oatmeal Cream Pies: 4, PBJs: 4, Bannas: 1.5, Bottles of Water: 2, Bottles of Gatoraid: 2.

Post Ride Consumption

Keith - Pizza Slices: 4, Cokes: 3
Hope - Pizza Slices: 4, Cokes: 1; Beers: 1/2

Monday, April 16, 2007

Mountain Bike Trip to LBL

For those of you who don't know LBL stands for Land Between the Lakes which is a large federal park between Clarksville, TN and Paducah KY. It has a great mountain bike trail at the north end of the LBL peninsula called the Canal Loop. The loop is about 12 miles long with the east side being less hilly that the west side. The terrain is fairly rocky so it dries well after rain and holds up over time. I have been riding there for over 7 years now and it is a great trail.

Hope and I were looking to get multiple rides in over the 3 day weekend with some grandparent over site of Abby but the weather did not co-operate and we only got one good ride in Friday morning before the rain, winds and cold weather set in for the weekend. Our one loop was a good one though and the trail was in great shape. Some one had been doing some great trail maintenance and integrating some trees that had fallen across the trail at different locations with built up log crossings of varing technical difficulties with some "blue" go-arounds for the less brave or skilled.

If you are wanting to go and ride at LBL it takes about 1:45 minutes to get there from Nashville and you just park at the North Welcome Center and the trail starts and ends there.

Also there is a very nice campground called Hillman Ferry just 3 miles south of there which has a connector trial to the Canal Loop and makes for a nice 18 mile ride from the campground. Rustic camping is also available for a $10.00 annual fee very close by.

Also of note is that the main north south highway going through LBL has been repaved and is buttery smooth.

Sunday, March 25, 2007

First Baby Pull with the Tandem


We pulled the baby trailer with the tandem for the first time today through Percy Werner Park on the challenging 11 mile loop. Every thing went well and we made good time. Abby was great and I think she had fun watching us on the tandem. We had a lot of people doing double takes and cars going by slowly as I do not think they had ever seen a baby trailer behind a tandem, especially in the park with all the hills.

Saturday, March 10, 2007

First 2007 Mountain Bike Ride

Thanks to Hope for keeping the baby and letting me head out for a ride at Montgomery Bell with Becky and some or her friends. Rode the "Yellow" trail for the first time and "OUCH" is a word that comes to mind. Usually we ride the Red to the Blue and then take the Green downhill section and back out which would usually take about an hour on a good day. 1:36 for this one trail for me so keep that in your head if you have never ridden the yellow loop as it is a totally different experience from the other trails at Monkey Bell. Lots of abrupt up and downs with momentum killers all over the place. Many tricky turns at the top of steep little hills. I see why "Climbing Queen" Becky really enjoys it, but for the Clydesdale's it is a bear. Becky's neighbor Brian did great with his new hard tail bike and he is a great rider.

Ride Stats:
Distance: NA
Time: 1:38
Avg. Speed: NA
Avg. Heart Rate: 145
Max Heart Rate: 170
Calories Burned: 1588
Total Climb: 2759 (That's what it said, really)

Saturday, March 3, 2007

Club Ride on the Tandem

Rode the tandem with Hope today with the Harpeth "Polar Bear Racing Team". Hope is a great stoker and makes for a fun outing with such a great engine on the back. Also thanks to Dirk for keeping us going through the winter. It was a cold, windy, sunny day and the club got to see me in tights for a full ride which I think is a first. Seemed like we had the wind in our face all day until the last leg up Leipers Creek back to the school. Happy to be on the tandem with the wind so bad since it does not seem to get blown around so much. The run in up Leipers Creek road with Larae and Frieda in tow was a blast with what felt like a 25 to 30 mph tailwind we were clipping along around 30 mph for a long time. The gusts were so strong that Freida had to back off because the wind was blowing her into us from behind. It was really weird going that fast and not hearing any wind in your ears and being able to talk to Hope without yelling.

Abby stayed with her friend Savanah and a friend of Shavanah while we got our ride it and she was in a great mood when we picked her up so she and the girls must have had a fun Saturday morning together.

Weather at start: 42 with strong winds, wind chill in the thirties

Ride Stats:
Distance: 32.3
Time: 1:52
Avg. Speed: 16.4 mph
Avg. Heart Rate: 149
Max Heart Rate: 170
Calories Burned: 2158
Total Climb: 1560